



How to Optimize Indoor Unit Placement for Best Cooling in X Steps
Where to Place the Indoor Unit of a Mini Split for Best Cooling in a Pacific Northwest Home Where to place the indoor unit of a mini split for best cooling in a Pacific Northwest home comes down to a few key rules most h
Where to Place the Indoor Unit of a Mini Split for Best Cooling in a Pacific Northwest Home
Where to place the indoor unit of a mini split for best cooling in a Pacific Northwest home comes down to a few key rules most homeowners overlook until after installation day.
Here is a quick-reference summary:
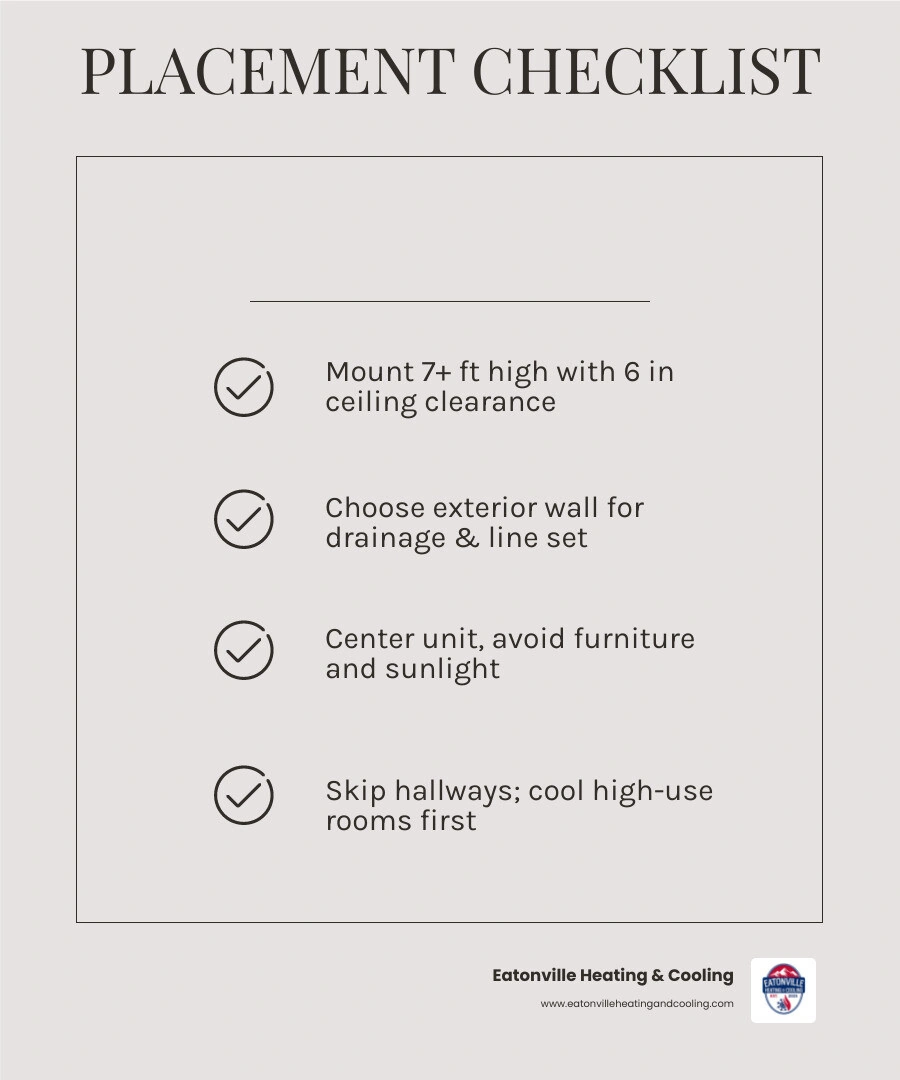
• Mount high on the wall - at least 7 feet from the floor, with a minimum of 6 inches of clearance between the top of the unit and the ceiling
• Choose an exterior (perimeter) wall - this simplifies the line set connection and allows gravity-fed condensate drainage
• Pick the right room - prioritize the spaces you use most, like master bedrooms, living rooms, or home offices
• Center the unit on the wall - this allows airflow to reach the whole room evenly
• Avoid heat sources and direct sunlight - nearby fireplaces, stoves, or sun-facing windows confuse the temperature sensor and reduce efficiency
• Keep the path clear - furniture, curtains, and shelving directly in front of the unit block airflow and force the system to work harder
• Skip hallways - a single unit in a hallway cannot push cold air around corners into closed rooms
Getting placement right from the start means better comfort, lower energy bills, and a longer-lasting system. Get it wrong, and you may end up with one freezing hallway and a bedroom that never quite cools down.
I'm Matthew Percy, owner of Eatonville Heating & Cooling, and after years of installing and servicing ductless systems across the South Sound, I've seen how much of a difference knowing where to place the indoor unit of a mini split for best cooling in a Pacific Northwest home can make for homeowners dealing with our region's unique mix of damp winters and increasingly hot summers. In the sections below, I'll walk you through every placement decision step by step so you can get it right the first time.
Key where to place the indoor unit of a mini split for best cooling in a pacific northwest home vocabulary:
• do you need a permit to install a mini split in washington state
• how is a ductless mini split installed step by step in western washington
Why Proper Placement Matters for Comfort and Efficiency in the PNW
In Western Washington, summers are getting warmer, and our classic, beautiful older homes in areas like Tacoma, Puyallup, and Lacey weren't built with modern air conditioning in mind. When homeowners upgrade to ductless mini split systems, they often focus entirely on the brand or the BTU rating. However, the physical placement of the indoor unit (the air handler) is just as critical to your comfort as the equipment itself.
Proper placement directly affects:
• Airflow Distribution: A mini split works by drawing warm air from the top of the room, cooling it over an evaporator coil, and pushing it back out from the bottom. If the unit is blocked or poorly positioned, that air cannot circulate, leaving hot spots in your living space.
• Temperature Accuracy: Mini split air handlers use built-in sensors to read the ambient room temperature. If the unit is mounted too close to a heat source (like a kitchen stove or a TV) or in direct sunlight, the sensor will get a false reading. This causes the system to run constantly or shut off prematurely.
• Preventing Short Cycling: When cold air is discharged and immediately bounces off an obstruction (like a nearby beam or a tall wardrobe), it travels right back into the unit's intake. The system "thinks" the entire room is cooled to your target temperature and shuts down before the rest of the room is actually comfortable.
• Energy Savings: Did you know that up to 30% of heating and cooling energy can be lost through leaky, uninsulated ductwork in traditional forced-air systems? Ductless mini splits bypass this issue completely, making them incredibly efficient. To learn more about how ductless systems compare to retrofitting older properties, check out our guide on Are Mini Splits More Efficient Than Adding Ductwork to an Older PNW Home.
If a mini split is poorly positioned, it can lose up to 20% of its overall operating efficiency. By taking the time to plan the layout, you ensure you get the full energy-saving benefits of your investment.
Step-by-Step Guide: Where to Place the Indoor Unit of a Mini Split for Best Cooling in a Pacific Northwest Home
Installing a ductless system in Western Washington requires a blend of technical precision and local building knowledge. From obtaining local permits to handling our wet, maritime climate, every detail matters. For a complete look at the physical installation process, read our detailed article on How is a Ductless Mini Split Installed Step by Step in Western Washington.
Here is our step-by-step guide to finding the perfect location for your indoor air handler.
Step 1: Choose the Best Rooms for Targeted Cooling
The beauty of a mini split is its zoning capability. Rather than wasting energy cooling unused spaces, you target the rooms where you spend the most time.
• Master Bedrooms and Guest Suites: Quality sleep is essential, and our bodies sleep best in cool environments. Installing a dedicated unit in the bedroom ensures personalized comfort without affecting the rest of the house.
• Home Offices: With the rise of remote work in Thurston and Pierce counties, home offices are filled with heat-generating computers, monitors, and lighting. A dedicated air handler keeps your workspace comfortable all day.
• Main Living Areas: Open-concept living rooms, dining rooms, and kitchens are the heart of the home. Placing a unit here helps maintain a steady baseline comfort level across your main floor.
Step 2: Mount High on the Wall for Optimal Airflow
Because cold air is naturally denser and heavier than warm air, it sinks. To take advantage of this natural physics principle, your indoor unit must be mounted high on a vertical wall.
• The 7-Foot Rule: For standard 8-foot ceilings, the indoor unit should be mounted approximately 7 feet from the floor. This gives the cold air room to cascade downward and mix evenly with the warmer air below.
• The 6-Inch Rule (Ceiling Gap): Never mount an air handler flush against the ceiling. Mini splits draw in warm air from the top of the unit. You must leave at least 6 inches of clearance between the top of the unit and the ceiling to prevent restricted airflow and overheating. Ignoring this clearance can drop your system's efficiency by up to 30%.
• Secure to Studs: Indoor units typically weigh between 20 and 30 pounds. They must be secured directly to wall studs using a stud finder—never rely on drywall anchors alone. For more local tips on preparing your home, see our Best Heat Pump Installation Eatonville Guide.
Step 3: Prioritize Perimeter Walls for Drainage and Efficiency
Whenever possible, we recommend mounting your indoor air handler on a perimeter (exterior) wall.
• Gravity-Fed Drainage: As your mini split cools, it extracts moisture from our humid Pacific Northwest air. This moisture condenses into water and must drain out of the home. Mounting on an exterior wall allows the condensate line to run straight outside using a simple, gravity-fed pitch.
• Simplified Line Sets: Connecting the indoor unit to the outdoor compressor requires drilling a single 3-inch hole through the wall. An exterior wall placement allows the refrigerant lines, electrical control wires, and drain tube to pass directly outside, keeping the indoor look clean and minimizing the need for complex, noisy condensate pumps.
Step 4: Avoid Obstructions, Direct Sunlight, and Heat Sources
To keep your system running smoothly, keep the unit away from environmental disruptors:
• Furniture Blockages: Ensure there is at least 6 feet of clear, unobstructed space in front of the air handler. Avoid placing it directly behind tall wardrobes, bookshelves, or decorative curtains.
• Direct Sunlight: If the sun shines directly on the air handler's chassis, the plastic heats up, confusing the internal thermostat. The unit will "think" the room is much hotter than it actually is, leading to over-cooling and wasted energy.
• Heat-Emitting Electronics: Avoid mounting the unit directly above a television, computer setup, or fireplace. The heat rising from these devices will cause the mini split to run constantly. Plus, mounting above expensive electronics carries a water leak risk if the condensate drain line ever becomes clogged.
• Kitchen Grease: Avoid installing units directly in kitchens. Cooking grease and steam quickly coat the delicate air filters and coils, leading to frequent blockages and a common musty odor known in the industry as "dirty sock syndrome."
Step 5: Coordinate with Outdoor Unit Placement
Your indoor unit's location is closely tied to where your outdoor condenser sits.
• Keep Line Sets Short: While modern mini splits can support line sets over 100 feet long, keeping the distance between the indoor and outdoor units as short as possible maximizes thermal efficiency and reduces refrigerant volume requirements.
• Vibration and Noise: Ensure the outdoor unit is mounted on a level, vibration-absorbing pad or secure wall brackets.
• Clearance Around the Condenser: The outdoor unit needs at least 20 to 24 inches of clear space around all sides for proper ventilation. Blocked airflow outside can decrease the system's overall efficiency by 15% or more.
Key Differences in Placement for Single-Zone vs. Multi-Zone Systems
How you place your indoor units depends heavily on whether you are installing a single-zone system (one indoor head connected to one outdoor condenser) or a multi-zone system (up to five or more indoor heads connected to a single outdoor compressor).
In single-zone setups, the goal is to maximize the airflow of a single room. In multi-zone setups, you must coordinate the placement of multiple units to ensure they work in harmony without fighting each other.
Primary GoalAirflow StrategyDrainage SetupOperating ModesIn multi-story homes common in older neighborhoods across Tacoma, Puyallup, and Olympia, heat naturally rises to the upper floors. A smart multi-zone strategy often involves placing a higher-capacity unit on the top floor to handle the heavy summer cooling load, while utilizing smaller units on the main floor for balanced comfort.
Maintenance Access and Drainage Considerations for PNW Homes
Our damp, maritime climate in the South Sound creates unique challenges for heating and cooling systems. High humidity levels mean your mini split will pull a significant amount of moisture out of the air during the summer cooling season.
• Gravity Drains vs. Condensate Pumps: While we always prefer gravity-fed drainage on exterior walls, some home layouts require mounting an air handler on an interior wall. This setup requires an electric condensate pump to push the water up into an attic or crawlspace and out of the home. That condensate pumps add a small amount of operational noise and require periodic maintenance to prevent clogs.
• Easy Filter Access: Mini split filters should be cleaned every 4 to 6 weeks to maintain peak efficiency and protect your indoor air quality. When choosing a mounting location, make sure you can safely reach the unit with a stepstool to pop open the front panel and slide the filters out. To learn more about maintaining your system in our damp climate, read How Often to Clean Mini Split Filters in a Damp South Sound Environment.
• Permits and Code Compliance: In Washington State, installing a heat pump system requires both mechanical and electrical permits to ensure the system is wired safely and complies with local energy codes. Working with a licensed professional ensures all paperwork is handled correctly. For details, read our guide on Do You Need a Permit to Install a Mini Split in Washington State.
Frequently Asked Questions About Mini Split Placement
Can I install a mini split in a hallway for whole-house cooling?
We generally advise against hallway installations. This is often referred to as the "ghost trap." Because hallways are narrow, confined spaces, the cold air discharged from the mini split will quickly bounce off the opposite wall and cycle back into the unit's intake. The thermostat sensor will register that the target temperature has been reached and shut the system down, leaving your adjacent bedrooms hot and stuffy. It is always better to place dedicated, smaller units directly in the rooms where you sleep or work.
Where to place the indoor unit of a mini split for best cooling in a pacific northwest home with vaulted ceilings?
Vaulted ceilings are beautiful, but they create "air stratification," where warm air rises and gets trapped at the very top of the room. If you mount the air handler too high on a vaulted wall, it will work overtime trying to cool that trapped hot air.
For the best cooling performance, mount the unit at standard height (around 7 to 8 feet from the floor) on a vertical wall. This keeps the cool air down in the "living zone" where you actually sit. Combining this with a ceiling fan running in reverse (clockwise at low speed) can help gently push warm air down in the winter and keep cool air circulating in the summer.
Where to place the indoor unit of a mini split for best cooling in a pacific northwest home bedroom?
In a bedroom, comfort and quiet operation are your top priorities. Avoid mounting the air handler directly over the head of your bed. Not only can the direct airflow on your face feel uncomfortable during the night, but any minor operational sounds or remote control beeps will feel much louder.
Instead, mount the unit on a wall adjacent to or opposite the bed, offset slightly so the air flows gently across the room rather than blowing directly onto you.
Conclusion
Finding the perfect spot for your mini split's indoor air handler is a balancing act between aesthetics, physics, and mechanical design. By mounting the unit high on an exterior wall, keeping it clear of heat sources, and avoiding drafty hallways, you ensure your home stays perfectly cool through our increasingly warm Western Washington summers.
At Eatonville Heating & Cooling, we are proud to be a local, family-owned business serving our neighbors in Eatonville, Puyallup, Graham, Tacoma, Olympia, Lacey, and the surrounding South Sound communities. We bring years of local expertise, honest service, and a commitment to quality to every single job.
If you are ready to upgrade your home's comfort, check out our Heat Pump Installation Eatonville WA Tips or Schedule your professional heat pump installation with Eatonville Heating & Cooling today for a personalized, in-home layout assessment!
Recent Posts

Adapting Yelm Wood-Framed Homes for Modern Central Air
Adding central air to an older wood-framed home takes careful planning. See how attic framing, ductwork and wiring shape a safe, effective upgrade.
Differentiating Between Normal Expansion Noises and Furnace Failure
Hearing a loud bang on the first chilly fall morning can be terrifying. Decide with confidence whether to let the system run or shut it down for emergency service.

How Federal Way's Fall Humidity Affects Indoor Air Quality
The transition to damp autumn weather creates a tricky shoulder season for your HVAC system. Without the AC running, ambient moisture gets trapped inside. See how to manage ventilation.

Deciding Between a Modulating and Two-Stage Furnace for Lacey Climates
Upgrading your heating system before the damp winter hits? Find out whether the precise comfort of a modulating unit or the reliability of a two-stage system fits your home.

What a Comprehensive Fall Furnace Inspection Actually Entails
A professional heating tune-up requires much more than a basic filter change. We pull back the curtain on the exact electrical and combustion tests that prevent winter breakdowns.
Repurposing Old AC Pads When Upgrading to a New Heat Pump
Preparing for a fall system upgrade? Reusing a sunken 1990s concrete base can cause poor drainage and oil starvation for modern equipment—see why leveling matters.